Overview
Custom tooltips were introduced as an in-app update in version 10.42
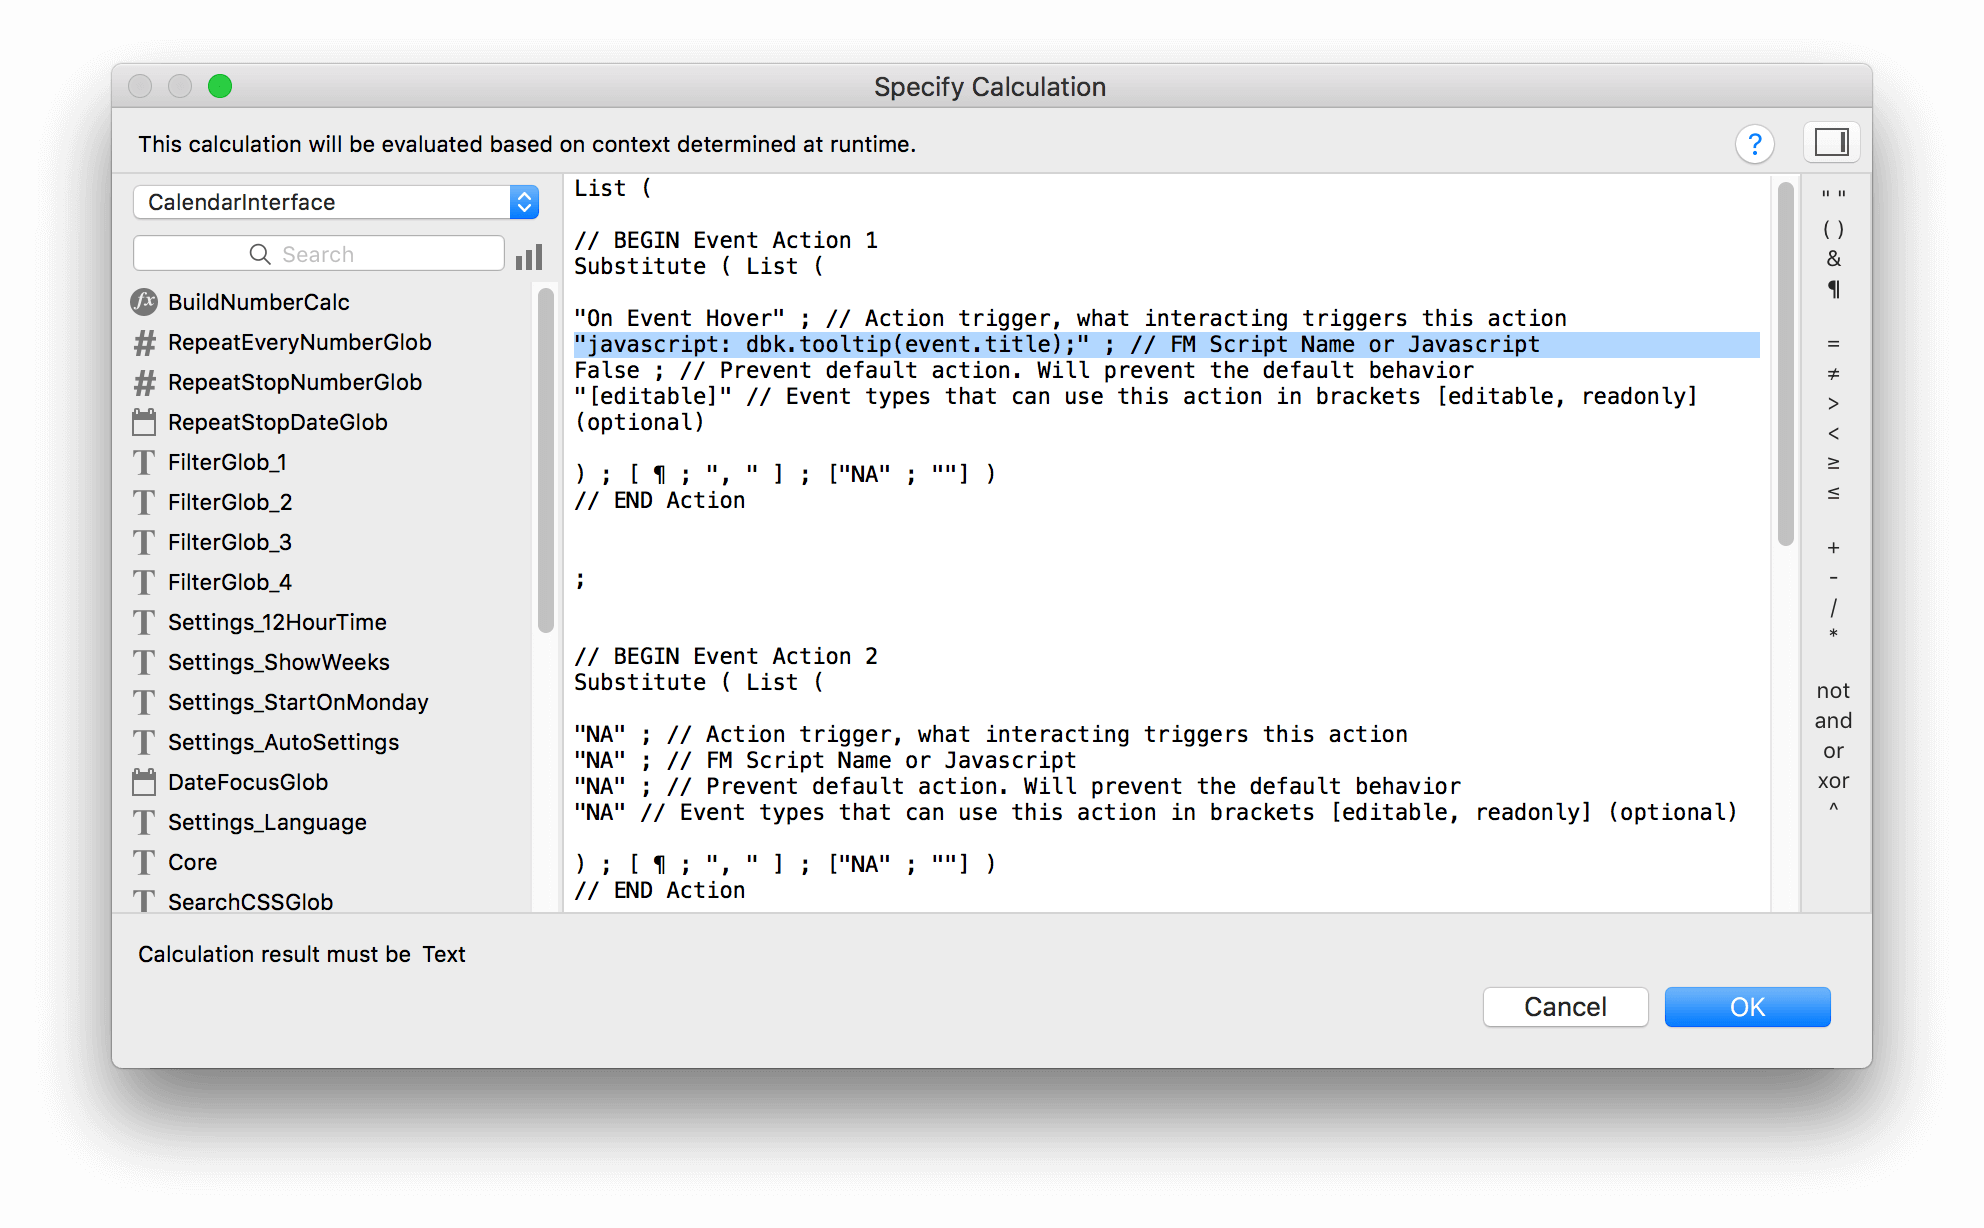
You can add tooltips to DayBack by creating an On Hover event action for any calendar source (any FileMaker table). Event actions can call URLs, FileMaker Scripts, or JavaScript, and to create a simple tooltip you'll use a JavaScript function called dbk_tooltip like this:
Tooltips have a built-in 350ms delay so they don't drive you crazy: you can change that by including an optional delay parameter like this (set that to zero to remove the delay altogether). This optional delay was introduced in version 10.44:
Add that to the $$sc_EventActions variable in the FileMaker script "Load Source Settings at Startup...". Here is what setting that variable looks like:
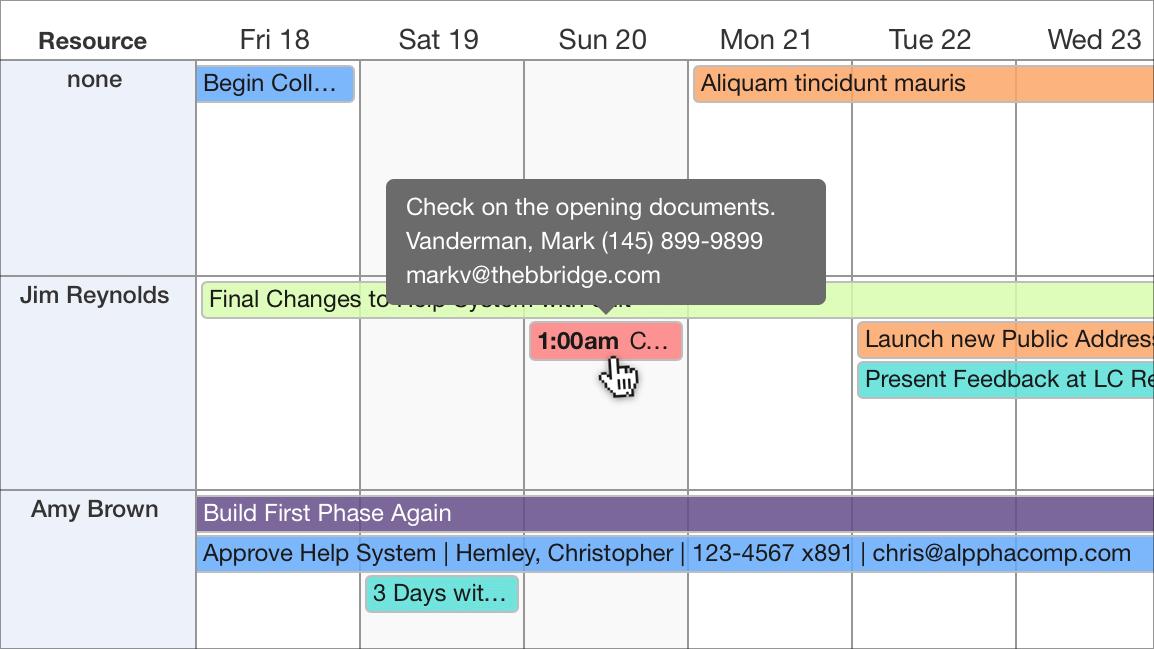
Then run the "Upon Opening" script to save your changes and you'll see a tooltip like this:
Customizing Your Tooltips
The tooltip will show anything returned by the JavaScript passed into dbk.tooltip so you can get very creative here. Below you'll find some tips for customizing the display. Please contact us if you'd like help making something special.
Adding More Fields
Add more fields to the tooltip by separating them with a "+" sign. You can also add HTML to make things more readable. Here's the event title followed by the resource on a new line:
The "event dot" notation is how you'll specify any fields you've made available to DayBack: these are the "under the hood" names for your fields, not the names used in your FileMaker solution. You'll see a list of all these under the hood names here: Event Actions / Referencing Fields.
If you'd like to include one or more of your additional fields in the tooltip, you reference those somewhat differently: [['fieldname']] where fieldname is the actual FileMaker field name without the table occurrence name in front of it. So you might do this:
Formatting Dates and Times
Tooltips have access to the momentjs library and you'll use that to format dates and times. For example, the event start time is event.start, but you'll want to display it like this
This may seem tedious, but moment's date and time formatting is really wonderful. Try this one:
or
If you want to show the start and end time together, here's a nice version that does so only when there are times and when the times differ:
You can also translate times into different time zones as shown in this example: timezone tooltips.
All the supported formatting options are here: https://momentjs.com/docs/#/displaying/
Styling Tooltips
Tooltips are styled with CSS. If you haven't played with DayBack's CSS before, you can learn more about it here, including how to call different CSS for different calendars, different views, and even different users.
The most basic styling involves just customizing the CSS class already assigned to the tooltips by default. This class is tooltip-custom and you can do things like this to make the text of the tooltip a different font size:
To change the background color of the tooltip you need to address it AND the little triangle that comes with it:
Going further, you can add your own CSS classes within the tooltip to style individual fields or elements differently. Here we've set up the tooltip so we can style the field labels differently than the field contents:
And the CSS would be something like:
Using Different Tooltips on Each View
Tooltips are defined per-source, so you can easily have different tooltip content for each of your different FileMaker tables. But you may also want to show slightly different content on different views/tabs in DayBack.
To do so, you'll create If() statements in your Javascript for each view you're interested in. The example below shows a simpler tooltip on Month and Day views, where you can already see the whole event title, and then adds the title back on all other views:
As shown above, you can get the current view name with:
You may also want to change the tooltip if the calendar's columns are below a certain width. You can do that by using this to find the width:
Note that longer, in-line JS like the example above can be hard to read, and you can't have unescaped quotes (or smart quotes!) in these actions when you use the "javascript:..." notation. For longer JS you may want to export your JS as a file and then use the "file:..." notation when describing your action. Exporting a file is described here under "Enabling Event Actions": Event Actions. This timezone tooltip example also describes how to use the export-file method for longer JS tooltips.


